Crash Course
UI Plugins Crash Course: oVirt Space Shooter
Introduction
Welcome, space traveler! This tutorial will walk you through the basics of creating your first UI plugin for oVirt web administration application (WebAdmin).
The oVirt Space Shooter plugin we will create is based on Alien Invasion, sample HTML5 game developed by Pascal Rettig and released under both GPL and MIT license. For those who are impatient, you can play the game here.
No prior JavaScript programming experience is required, just make sure you have oVirt Engine up and running on your system. Oh, and once we’re done creating our plugin, be prepared to blast some aliens!
Note: code presented here aims to demonstrate how to write a simple plugin, it’s not meant to be a showcase of best JavaScript coding practices. When writing a real-world plugin, you should follow good JavaScript coding practices such as scoping your application within a single global variable, using closure for proper information hiding, etc.
Plugin source code is available from sample UI plugin repository as space-shooter-plugin - see the README file for details on installation.
If you have any questions or find any issues, send your feedback to Vojtech Szocs (Vszocs) vszocs@redhat.com
Level 1: Hello UI Plugins
Our journey starts in /usr/share/ovirt-engine/ui-plugins directory, home of plugin meta-data and other plugin resources. Let’s go ahead and create descriptor for our plugin inside this directory:
  /usr/share/ovirt-engine/ui-plugins/space-shooter.json

{
    "name": "space-shooter",
    "url": "plugin/space-shooter/plugin.html",
    "resourcePath": "space-shooter-resources"
}
For those who are curious about the meaning of each attribute:
nameis the unique name of our plugin, think of it as plugin IDurlpoints to plugin host page which is basically an HTML page that bootstraps plugin coderesourcePathtells Engine where to find plugin resource files, such as the plugin host page
Note that the url in above snippet is relative and follows plugin/<pluginName>/<relativePath> pattern. You can use it to fetch plugin resource files that reside under resourcePath directory. In other words, you don’t have to run your own custom web server to serve plugin resource files, Engine does this for you out-of-the-box.
Having the plugin descriptor in place, all that remains is plugin host page. Let’s create space-shooter-resources sub-directory along with plugin host page inside it:
  /usr/share/ovirt-engine/ui-plugins/space-shooter-resources/start.html

<!doctype html>
<html>
<head>
    <meta charset="utf-8">
</head>
<body>
<script type='text/javascript'>

    // Get API object for 'space-shooter' plugin
    // Note: using 'parent' due to plugin code being evaluated within an iframe context
    var api = parent.pluginApi('space-shooter');

    // Register event handler functions for later invocation by UI plugin infrastructure
    api.register({
        UiInit: function() {
            alert('Woohoo!');
        }
    });

    // Tell plugin infrastructure that we are good to go, expect UiInit callback
    api.ready();

</script>
</body>
</html>
And that’s about it! It takes only two files to create a minimal UI plugin.
Without even restarting Engine, reload WebAdmin in your browser, log in and embrace the awesome Woohoo! alert window.
As you can see, plugin host page is your typical HTML web page with some JavaScript to interact with plugin API. As you may have guessed, with JavaScript around, the sky is the limit - design and implement your plugin your way. Want to use popular JavaScript libraries like AngularJS or tools like CoffeeScript? You can. Want to write your plugin using vanilla JavaScript? You can. Plugin API is designed to be simple and not to get in your way, regardless of how you choose to write your plugin.
Note that there’s no HTML markup within the plugin host page and for a good reason - the purpose of this page is to bootstrap actual plugin code. WebAdmin evaluates plugin host page via hidden iframe element attached to HTML DOM, so WebAdmin vs. plugin integration happens through plugin API, discouraging direct HTML DOM manipulation of WebAdmin UI.
Level 2: Must Blast Some Aliens
Let’s take the Alien Invasion game and integrate it into WebAdmin with our plugin. Sounds a bit more complicated than Woohoo! alert window, but is it really that complicated?
Download the game and put its files under /usr/share/ovirt-engine/ui-plugins/space-shooter-resources/game directory. Since the game relies on specific HTML5 features that might not be available in older browsers, download and use Modernizr for detecting these features.
Plugin file structure should now look like this:
/usr/share/ovirt-engine/ui-plugins/space-shooter.json- plugin descriptor/usr/share/ovirt-engine/ui-plugins/space-shooter-resources/game/*- game files/usr/share/ovirt-engine/ui-plugins/space-shooter-resources/modernizr.custom.js- Modernizr library/usr/share/ovirt-engine/ui-plugins/space-shooter-resources/start.html- plugin host page
Let’s open plugin host page and add some more JavaScript:
/usr/share/ovirt-engine/ui-plugins/space-shooter-resources/start.html
<!doctype html>
<html>
<head>
<meta charset="utf-8">
<!-- Use Modernizr for detecting necessary HTML5 features like Canvas -->
<script type='text/javascript' src='modernizr.custom.js'></script>
</head>
<body>
<script type='text/javascript'>
var api = parent.pluginApi('space-shooter');
var openDialog = function() {
// Show modal dialog with actual game content
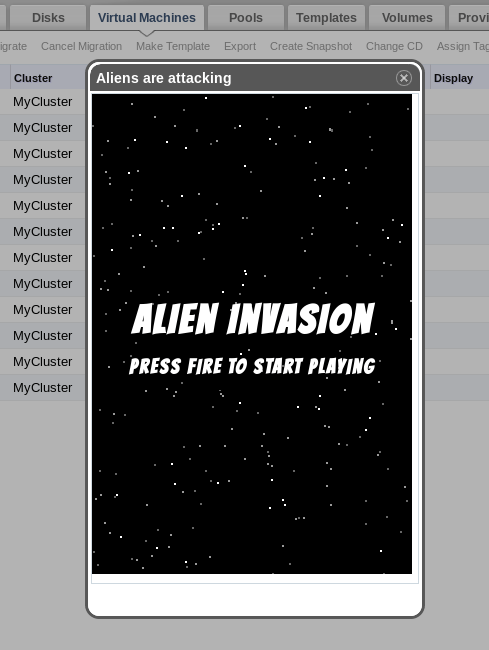
api.showDialog(
'Aliens are attacking', // Title
'space-shooter-dialog', // Dialog token
'plugin/space-shooter/game/index.html', // Content URL
'340px', // Width
'560px' // Height
);
};
var browserRocks = function() {
// Detect necessary HTML5 features via Modernizr
return Modernizr.canvas && Modernizr.canvastext;
};
api.register({
UiInit: function() {
if (browserRocks()) {
openDialog();
}
}
});
api.ready();
</script>
</body>
</html>
The code is pretty much straight-forward. UiInit callback performs HTML5 feature detection and calls openDialog if successful. api.showDialog takes care of opening new modal dialog with content loaded from the given URL. Notice that the URL points to game’s index.html served from /usr/share/ovirt-engine/ui-plugins/space-shooter-resources/game directory.
Reload WebAdmin in your browser, log in and see what happens! Don’t spend too much time playing the game, though.
Level 3: Data Center Under Attack
Opening new modal dialog on user login is just too easy. What if the aliens from outer space wanted to invade your precious Data Centers? Let’s make this happen and move the battle from generic dialog into Data Center main tab.
Here, we want to do following things:
- Allow opening game dialog only if the user selects a specific Data Center
- Since a shooter game might distract admins from doing their work, allow opening game dialog only via secret context-menu item
- Once opened, the dialog cannot be closed unless you win at least once
- Those who cannot beat the game (it can happen!) can use Cheat button
*
* Cheating works in video games. In real life, cheaters always lose.
Implementing these improvements seems like a lot of work, let’s see how much code it really takes.
First, we need to register some more event handler callbacks:
DataCenterSelectionChangetriggered when item selection changes in Data Center main tabMessageReceivedtriggered when custom content (game) sends us a message*
* To facilitate game → plugin communication, we will use HTML5 postMessage API.
  /usr/share/ovirt-engine/ui-plugins/space-shooter-resources/start.html

api.options({
    // Configure source origin(s), i.e. protocol://domain:port
    // from which HTML5 message events will be accepted
    allowedMessageOrigins: ['http://127.0.0.1:8080']
});

var victory = false; // Has player won at least one game in the current game dialog?
var dataCenter = null; // Data Center entity associated with the current game dialog
var gameContentWindow = null; // Reference to game Window object

api.register({

    // Called by the infrastructure as part of plugin initialization,
    // will be called just once during the lifetime of a plugin
    UiInit: function() {
        if (browserRocks()) {
            init(); // Defined later on
        }
    },

    // Called when item selection changes in Data Center main tab,
    // useful for keeping track of currently selected Data Center entity
    DataCenterSelectionChange: function() {
        if (arguments.length == 1) {
            // Single entity was selected, remember it
            dataCenter = arguments[0];
        } else {
            // Otherwise, forget the entity
            dataCenter = null;
        }
    },

    // Called when another Window (i.e. custom UI contributed by a plugin)
    // sends message to WebAdmin Window via HTML5 postMessage API,
    // ideal for cross-window communication that works across different origins
    MessageReceived: function(data, sourceWindow) {
        // If we get here, we already passed allowed source origin check
        switch (data) {
            // Game content just got loaded
            case 'GameInit':
                gameContentWindow = sourceWindow;
                break;
            // User just won the game
            case 'GameWin':
                victory = true;
                break;
        }
    }

});
Since we want the game to notify our plugin upon specific occasions, we use api.options to configure source origin from which message events will be accepted. Above snippet uses http://127.0.0.1:8080 so we assume Engine runs locally and WebAdmin is available via HTTP at port 8080.
The DataCenterSelectionChange callback receives currently selected items as function arguments. Since we only care for single Data Center selected in the main tab, we check arguments.length and remember or forget current selection.
The MessageReceived callback is used to process two kinds of messages sent by the game Window:
GameInitfired right after game’s HTML document gets loaded, right before the game initializes its CanvasGameWinfired right after user wins the game, i.e. beats all levels
We use GameInit to keep the reference to game Window object in order to call functions on this object later on. In other words, we establish two-way communication between game and plugin, with game being the initiator of this communication.
Let’s modify game.js under game directory to add the missing bits:
  /usr/share/ovirt-engine/ui-plugins/space-shooter-resources/game/game.js

...
var winGame = function() {
    Game.setBoard(3, new TitleScreen('You win!',  'Press fire to play again', playGame));
    parent.postMessage('GameWin', '*'); // Change here
};
...
window.addEventListener('load', function() {
    parent.postMessage('GameInit', '*'); // Change here
    Game.initialize('game', sprites, startGame);
});
...
Since the game is rendered via iframe element attached to HTML DOM, parent refers to WebAdmin Window object.
Remember the missing init function used inside our UiInit callback? Let’s add this function and complete our plugin:
/usr/share/ovirt-engine/ui-plugins/space-shooter-resources/start.html
var dialogToken = 'space-shooter-dialog';
var dialogUrl = 'plugin/space-shooter/game/index.html';
var init = function() {
// Add new action button to Data Center main tab
api.addMainTabActionButton(
'DataCenter', // To which main tab the button should be added to
'Protect DataCenter from Alien Invasion', // Label
// Extra options for addMainTabActionButton function
{
isEnabled: function() {
// Enable button only when selecting single Data Center
return arguments.length == 1;
},
onClick: function() {
// Reset victory flag and open new game dialog
victory = false;
openDialog();
},
location: 'OnlyFromContext' // Button available only from context menu
});
};
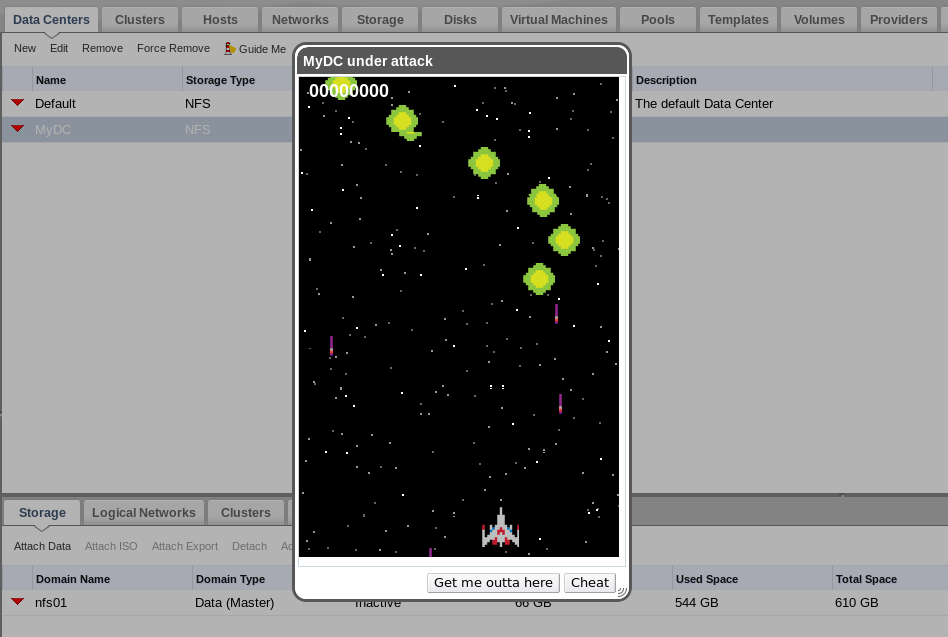
var openDialog = function() {
// Show modal dialog with actual game content
api.showDialog(dataCenter.name + ' under attack', dialogToken, dialogUrl, '340px', '560px',
// Extra options for showDialog function
{
closeIconVisible: false, // Hide dialog's close icon
closeOnEscKey: false, // Prevent user from closing dialog with Escape key
resizeEnabled: true, // Allow dialog resizing
buttons:
[
// Button for those who cannot beat the game (it can happen!)
{
label: 'Cheat',
onClick: cheatGame
},
// Button to close the dialog
{
label: 'Get me outta here',
onClick: closeDialog
}
]
});
};
var closeDialog = function() {
if (victory) {
api.closeDialog(dialogToken);
} else {
alert('Not so fast! Destroy the aliens at least once.');
}
};
var cheatGame = function() {
if (gameContentWindow != null) {
// Invoke function on game Window object
gameContentWindow.winGame();
}
};
Instead of showing new modal dialog with game content right away, the init function adds new action button to Data Center main tab via api.addMainTabActionButton. Think of action button as a button located in corresponding main tab’s upper panel. For example, New, Edit and Remove are all action buttons living inside Data Center main tab. Each action button usually gets reflected into context menu for given main tab, but there can be exceptions.
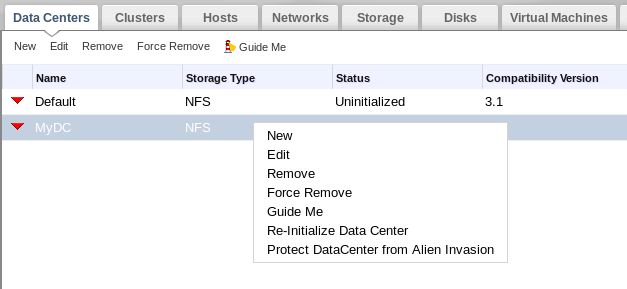
In our case, we want the Protect DataCenter from Alien Invasion button to be visible only via context-menu item, so we customize location within addMainTabActionButton options. Each time item selection changes in Data Center main tab, isEnabled callback will be fired to determine whether the button should be enabled or disabled. In case the button is enabled, onClick callback will be fired when a user clicks the button. Note that both callbacks receive currently selected items (entities) as function arguments.
The openDialog function is pretty much straight-forward, we just pass some extra options to customize the dialog and add some buttons to it. On the other hand, cheatGame shows an interesting pattern - utilizing two-way communication between game and plugin by invoking function (i.e. winGame) on game’s Window object.
Secret Level: Making Things Configurable
Blasting through waves of aliens is nice, but what if someone accessed WebAdmin from a remote machine? Assuming WebAdmin would be exposed at https://engine-domain:8765, someone would need to modify allowedMessageOrigins inside plugin host page to ensure that communication between game and plugin works properly. Of course, we could still use * as the value for allowedMessageOrigins to accept message events from any origin, however doing this would open back door for malicious JavaScript to exploit our plugin.
To make things a bit more configurable, let’s add new configuration option right into plugin descriptor:
  /usr/share/ovirt-engine/ui-plugins/space-shooter.json

"config": {
    "allowedOrigins": ["http://127.0.0.1:8080"]
}
The config attribute is completely optional and can be used to contain default (plugin-specific) configuration. Users shouldn’t modify plugin descriptor directly - if you need to override default configuration, create plugin user configuration inside /etc/ovirt-engine/ui-plugins directory, using -config suffix:
  /etc/ovirt-engine/ui-plugins/space-shooter-config.json

"config": {
    "allowedOrigins": ["http://127.0.0.1:8080", "https://engine-domain:8765"]
}
Each time our plugin gets loaded in WebAdmin, UI plugin infrastructure takes care of merging user configuration (if any) on top of default configuration (if any). In our case, allowedOrigins from user configuration would override allowedOrigins from default configuration.
Accessing plugin configuration at runtime is as easy as calling api.configObject:
  /usr/share/ovirt-engine/ui-plugins/space-shooter-resources/start.html

// Get runtime plugin configuration, i.e. custom configuration (if any)
// merged on top of default configuration (if any)
var config = api.configObject();

api.options({
    // Note: "config.allowedOrigins" is JSON array
    allowedMessageOrigins: config.allowedOrigins
});
Level 4: Insert Coin And Keep The Score
Let’s add one more feature to our plugin: the ability to track score (games won) per each Data Center via custom sub tab under Data Center main tab. Heroic deeds of admins blasting through waves of aliens shouldn’t be forgotten, right?
/usr/share/ovirt-engine/ui-plugins/space-shooter-resources/start.html
var subTabWindow = null; // Reference to 'Score' sub tab Window object
var subTabToken = 'space-shooter-dc-score';
var subTabUrl = 'plugin/space-shooter/dc-score.html';
var init = function() {
// Add new action button to Data Center main tab
api.addMainTabActionButton( ... );
// Add new 'Score' sub tab under Data Center main tab
api.addSubTab(
'DataCenter', // To which main tab the sub tab should be added to
'Space Shooter Score', // Label
subTabToken, // Sub tab token
subTabUrl // Content URL
);
};
var getKey = function() {
// Calculate unique key (string) for storing and retrieving game score for
// given user + Data Center combination, i.e. admin@internal_dc123_DCScore
return dataCenter != null ? api.loginUserName() + '_' + dataCenter.id + '_DCScore' : null;
};
var getScore = function() {
// Return current score as string, or 0 if there is no score yet
return localStorage.getItem(getKey()) || '0';
};
var incScore = function() {
// Increment current score by 1, store the result as string
localStorage.setItem(getKey(), (parseInt(getScore(), 10) + 1) + '');
};
var updateSubTab = function() {
if (subTabWindow == null || dataCenter == null) {
return;
}
// Get the current user score
var score = getScore();
var intScore = parseInt(score, 10);
// Calculate rank based on user score
var rank, rankColor;
switch (true) {
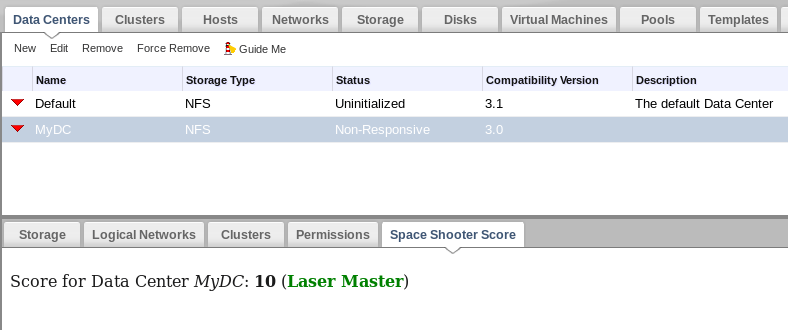
case (intScore >= 10):
rank = 'Laser Master';
rankColor = 'green';
break;
case (intScore >= 3):
rank = 'Veteran';
rankColor = 'orange';
break;
case (intScore >= 1):
rank = 'Survivor';
rankColor = 'red';
break;
default:
rank = 'Newbie';
rankColor = 'gray';
break;
}
// Update 'Score' sub tab
subTabWindow.update(dataCenter.name, score, rank, rankColor);
};
api.register({
...
MessageReceived: function(data, sourceWindow) {
switch (data) {
// Game content just got loaded
case 'GameInit':
gameContentWindow = sourceWindow;
break;
// User just won the game
case 'GameWin':
victory = true;
incScore();
updateSubTab();
break;
// 'Score' sub tab asks for current user score
case 'GetDataCenterScore':
subTabWindow = sourceWindow;
updateSubTab();
break;
}
}
...
});
Just like with game content, we use the same technique to establish two-way communication between custom sub tab and plugin.
To keep things simple, getScore and incScore functions utilize HTML5 Local Storage to fetch and persist score locally in browser.
Finally, we need to add dc-score.html representing custom sub tab content:
  /usr/share/ovirt-engine/ui-plugins/space-shooter-resources/dc-score.html

<!doctype html>
<html>
<head>
    <meta charset="utf-8">
</head>
<body>

<p>
Score for Data Center <span id='dataCenterName'>?</span>:
<span id='score'>?</span> (<span id='rank'>?</span>)
</p>

<script type='text/javascript'>

    // Ask the plugin for current user score
    parent.postMessage('GetDataCenterScore', '*');

    // The plugin should call this function in response to GetDataCenterScore message
    var update = function(dataCenterName, score, rank, rankColor) {
        document.getElementById('dataCenterName').innerHTML = '<em>' + dataCenterName + '</em>';
        document.getElementById('score').innerHTML = '<b>' + score + '</b>';
        document.getElementById('rank').innerHTML = '<b>' + rank + '</b>';
        document.getElementById('rank').style.color = rankColor;
    };

</script>

</body>
</html>
And we’re done! Take a break from coding and play the game to see new score and ranking feature in action.
Mission Accomplished
Congratulations! You’ve made it past all the levels, you should have a pretty good understanding of UI plugins now.