Most of them are outdated, but provide historical design context.
They are not user documentation and should not be treated as such.
Documentation is available here.
Affinity Labels Management via the Administration Portal
Summary
Provide affinity label management within the the administration portal UI.
Owner
- Owner: Phillip Bailey
- Email: phbailey@redhat.com
Detailed Description
Affinity labels were introduced in version 4.0, but could only be managed via the REST API. This feature allows users to manage their labels without ever leaving the the administration portal UI.
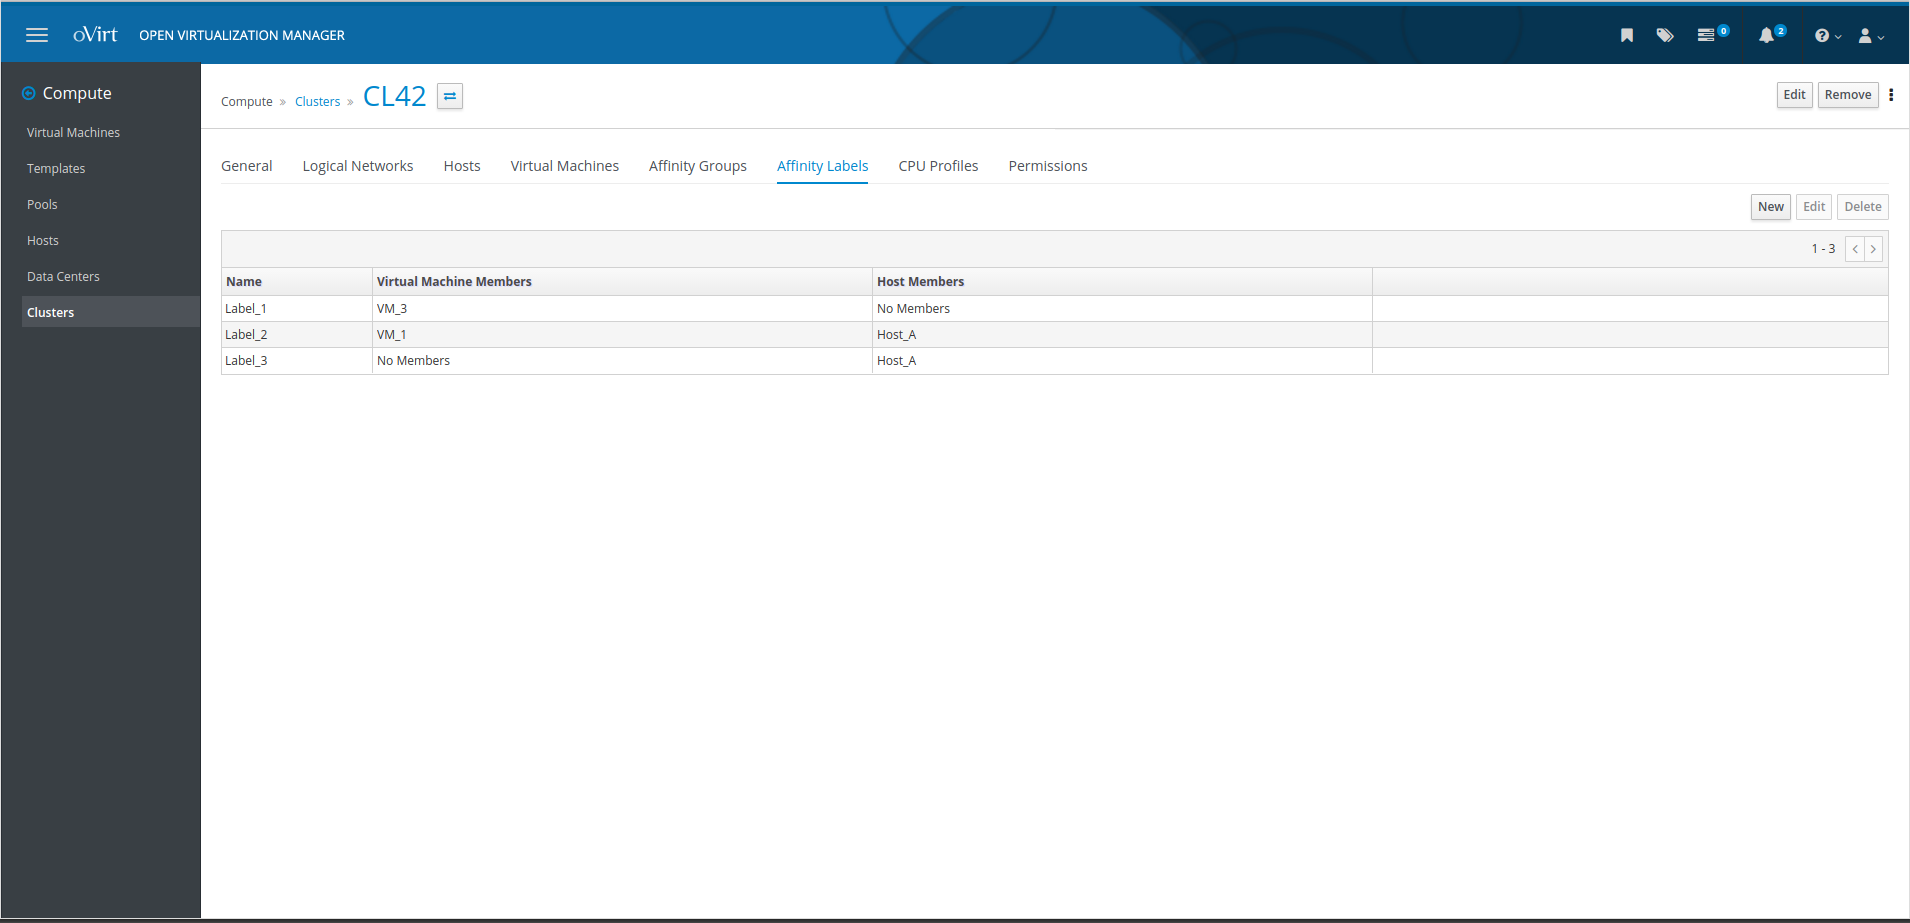
Affinity Label Detail Tabs
An affinity labels detail tab has been added to the clusters, virtual machines, and hosts main views. They can be accessed by clicking on the name of any entity from the main view and click on “Affinity Labels”.
The detail tabs for the virtual machines and hosts main views display the labels that have been assigned to the currently selected entity. For the moment, the clusters detail tab displays all labels in the system. In the future, the plan is to only display labels associated with the selected cluster.

Label Creation/Modification
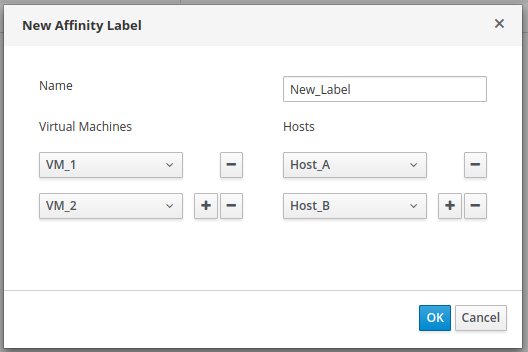
Affinity labels can be created and modified from the detail tabs. To create a new affinity label:
- Click the “New” button in the top right corner to open the “New Affinity Label” popup dialog
- Enter a name for the label in the “Name” field
- Select the desired VMs and hosts from the drop down menus
- Click the plus buttons next to the drop downs to add additional VMs and hosts
- Click “OK”
Note: If you open the dialog from the detail tabs located in the VM or host main tabs, the currently selected entity will automatically be selected for you.
To edit a label:
- Click on the label you wish to edit
- Click the “Edit” button in the top right corner to open the “Edit Affinity Label” popup dialog
- Make the desired changes
- Click “OK”
Label Deletion
Affinity labels can be deleted from the detail tab associated with the clusters main view. To delete a label:
- Click on the label you wish to delete
- Click the “Edit” button in the top right corner to open the “Edit Affinity Label” popup dialog
- Click the minus buttons next to each VM and host entry until they are all removed
- Click “OK”
- With the label still selected, click “Delete” in the top right corner
- Click “OK” on the confirmation popup
Note: All hosts and VMs must be removed from a label before it can be deleted.
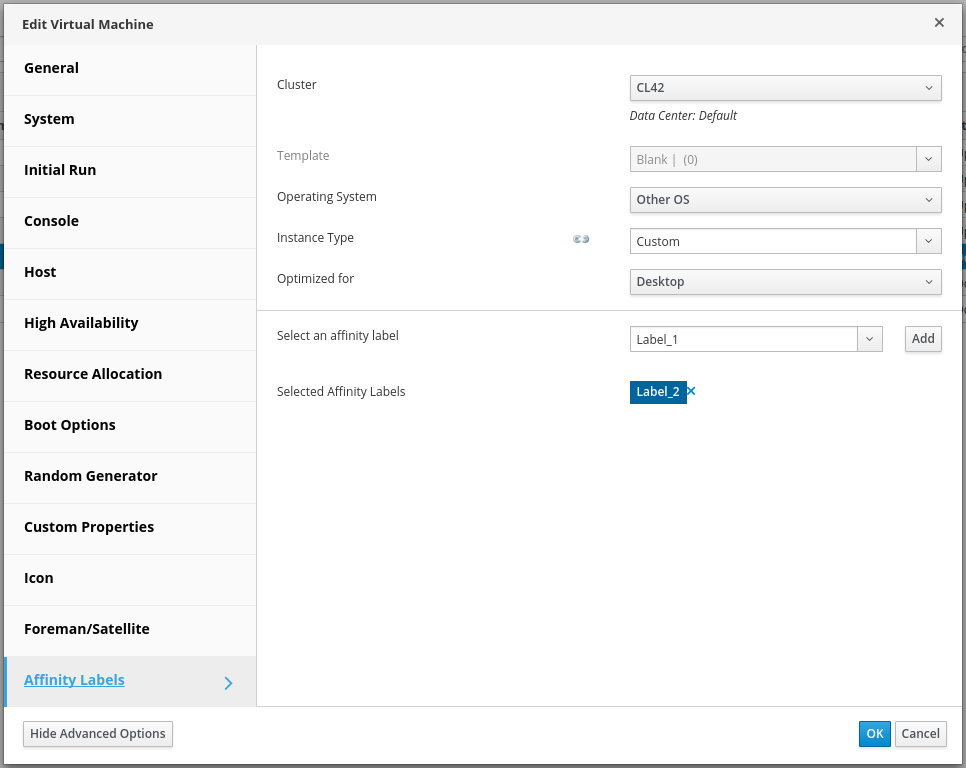
Adding/Removing Existing Labels
Existing affinity labels can be added to VMs and hosts from the “Affinity Labels” side tab of their respective new/edit popup dialogs.
To locate the affinity labels side tab:
- From the Administration Portal vertical menu, select Compute > Virtual Machines / Hosts
- Click the “Edit” button in the top right corner to open the respective edit popup dialog
- Click on “Affinity Labels” at the bottom of the vertical menu
To add a label:
- Either click the drop down arrow and select one from the list OR
- Click inside the text box area of the drop down and enter text to filter the list
- Once you have selected a label, click the “Add” button
- The label will be added to the list of selected labels located below the drop down menu
To remove a label, simply click the “x” next to the label name in the selected label list.
References
RFE in Bugzilla: BZ 1338799